深度图
深度是个非常重要的信息,反映物体离屏幕的远近,利用好深度可以实现许多效果,Unity中存储了一张屏幕空间中的深度图,我们将要分析该图的是如何产生以及如何进行应用
屏幕空间深度
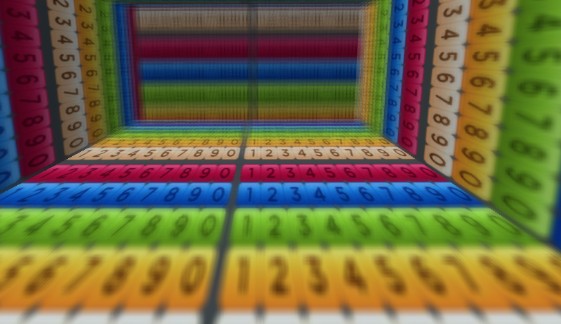
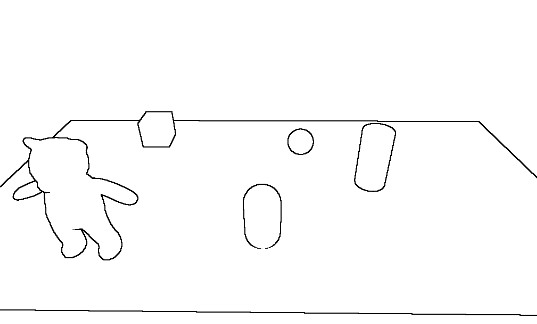
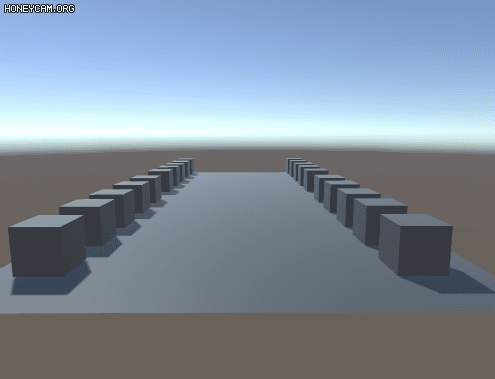
深度图中存储的就是屏幕空间深度值,范围为0 - 1。当在近裁面时,depth = 0,当在远裁面时depth = 1。我们可能会猜想 depth从视空间经过透视变换后公式为depth = (Z(eye) - N) / (F - N),这样深度就是线性从0 - 1变化了,但是我们根据此公式得出深度后在屏幕空间进行插值后并不能保证对应的点在投影前的空间是线性变化的,如下如图,C1F1和F1E1在裁剪面投影大小一致,但是实际距离差距很大
![]()
实际上透视投影后,在屏幕空间进行插值的数据和1/Z成正比 Depth = (aZ + b) / Z ,将Z = N ,Depth = 0 以及 Z = F ,Depth = 1带入可以解得 a = F / (F - N),b = NF / (N - F) ,最终获得 depth = (F / (F - N) * Z + NF / (N - F)) / Z (也可以通过投影公式推倒得出)
透视空间深度
在使用深度时,我们需要使用更加直观的透视空间深度来实现效果,我们可以通过上述的公式反推获得透视空间的深度 Z = 1/ (((N - F) / N) * Depth + F / N) ,在Unity中可以直接通过Linear01Depth进行转换,如果要将其转化为0 - F 变化区间,将Z *F 即可,即 Z = 1/ (((N - F) / NF) * Depth + 1 / N)
1 | // Values used to linearize the Z buffer (http://www.humus.name/temp/Linearize%20depth.txt) |
精度问题
由于屏幕深度与 1/透视深度 成正比,导致接近近裁面和远离近裁面的深度分布是不均匀的,导致较远除的物体即使相距较远,存储的深度是相同的,相同的深度会导致物体的像素都可能出现在前面形成了ZFighting现象。此外浮点数的精度也是数值小进度高,数值大精度低,因此,我们一般采用1 - Z的方式进行深度,存储,Unity就是通过这种方式进行深度存储,只不过在Linear01Depth和LinearEyeDepth是会按照存储方式进行处理的,我们不需要额外进行处理(可以参照上面代码端的_ZBufferParams注释)
深度图应用
重建世界坐标系
我们在写shader过程中经常要用到像素点在世界坐标系下的坐标,但是如果是在后处理过程中,该坐标无法直接获取,但可以通过深度重建世界坐标系获取,有利用VP矩阵重建和利用方向矩阵重建两种方式
利用VP矩阵重建
我们知道NDC坐标是通过世界坐标系下坐标通过左乘VP矩阵并归一化获取达到的,而NDC坐标可以可以通过UV * 2 - 1获取,通过VP逆矩阵可以还原世界坐标系下的坐标,具体推倒过程如下:
已知 NDC = Clip / Clip.w World = (VP^-1) * Clip => World = VP^-1 * NDC * Clip.W (1)
因为World.w = 1,可得 1 = World.w = (VP^-1 * NDC ).w * Clip.w => Clip.w = 1 / (VP^-1 * NDC).w (2)
结合(1)(2) 得 World= (VP^-1 * NDC) / (VP^-1 * NDC).w
笔者认为这边也可以理解为NDC和Clip坐标是同一个坐标在不同空间下的不同表示,NDC通过左乘VP逆矩阵获取到的坐标和世界空间坐标应该也是不同空间的不同表示,而世界空间下的w是1,我们将xyzw都除以w,就能获取到世界空间下的该点坐标
代码如下
1 | //获取NDC |
利用方向矩阵重建
视椎体有四个角和屏幕的四个角是对应的,假设有个点落在了视椎体左上角的线上,我们已知的是近裁面距离以及相机的朝向,因此我们可以获得相机到近裁面左上角的向量toTopLeft,利用相似三角形我们可以得到toPoint / depth = toTopleft / near,即toPoint = depth * (toTopleft / near),同理,在视椎体四个角的线上的点都可以通过已知数值表达出来,我们可以先将这四个数据存储起来,然后在顶点着色器根据UV坐标计算出每个顶点的世界坐标方向向量,由于顶点到片元是会进行插值计算的,这样相当于得到了每个像素的世界坐标方向向量,最后在片元着色器拿到像素深度后与方向向量相乘并加上相机的世界坐标,即可得到世界空间下的坐标
代码如下:
1 | Camera cam = Camera.main; |
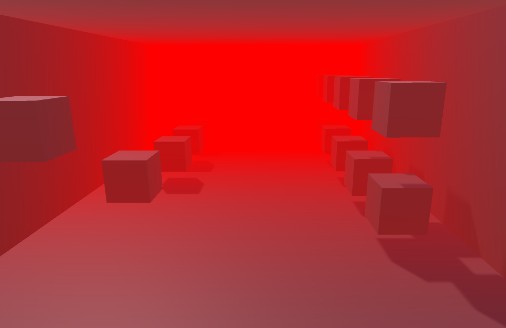
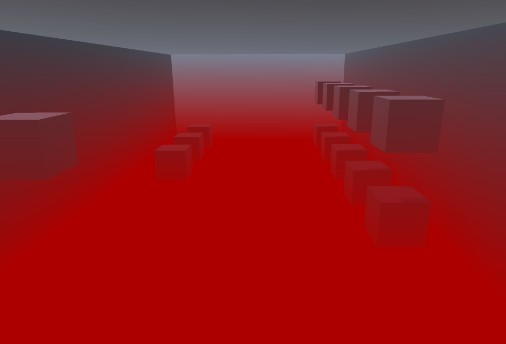
渲染深度图
将物体的深度数值作为颜色渲染
代码如下:
C#中需要设置相机模式我们才能获取到深度图,并将渲染信息依据计算结果进行更新
public Material mat;

void Start () {
    Camera.main.depthTextureMode = DepthTextureMode.Depth;
}

private void OnRenderImage(RenderTexture source, RenderTexture destination)
{
    if (mat != null)
        Graphics.Blit(source, destination, mat);
    else
        Graphics.Blit(source, destination);
}
1 | fixed4 frag (v2f i) : SV_Target |
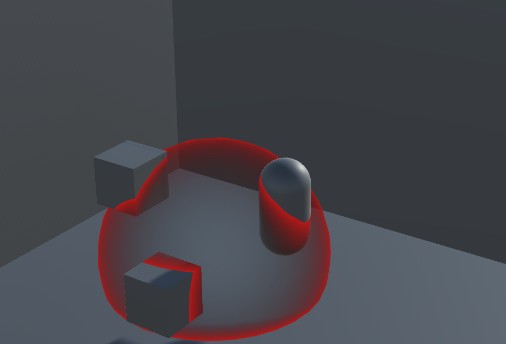
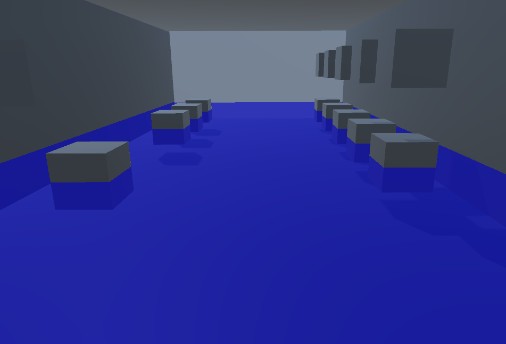
相交高亮
相交高亮是非后处理渲染,由于在渲染物体像素时,深度图是没有渲染该物体的深度,(这边有点问题,实际是在Shader中将FallBack关掉,让物体的深度信息不会写入到深度图中,使得物体实际深度和深度图有差距)我们可以利用这一点,依据该深度值和当前像素点与相机的距离,判断该像素点的相交情况,如果差值较大说明很附近物体较远,差值较小说明附近物体接近,即为相交处
代码如下:
v2f vert (appdata v)
{
    v2f o;
    o.vertex = UnityObjectToClipPos(v.vertex);
    o.uv = TRANSFORM_TEX(v.uv, _MainTex);
    o.screenPos = ComputeScreenPos(o.vertex);//屏幕坐标
    COMPUTE_EYEDEPTH(o.eyeZ);//获取视空间的相机距离
    return o;
}

fixed4 frag (v2f i) : SV_Target
{
    fixed4 col = tex2D(_MainTex, i.uv);
    float screenZ = LinearEyeDepth(SAMPLE_DEPTH_TEXTURE_PROJ(_CameraDepthTexture, UNITY_PROJ_COORD(i.screenPos)));
    float halfWidth = _IntersectionWidth / 2;
    float diff = saturate(abs(i.eyeZ - screenZ) / halfWidth);
    fixed4 finalColor = lerp(_IntersectionColor, col, diff);
    return finalColor;
}
能量场
相交高亮加上半透明和边缘高亮效果还可以实现能量场效果
v2f vert (appdata v)
{
    v2f o;
    o.vertex = UnityObjectToClipPos(v.vertex);
    float4 worldPos = mul(unity_ObjectToWorld, v.vertex);
    o.worldNormal = UnityObjectToWorldDir(v.normal);
    o.worldViewDir = UnityWorldSpaceViewDir(worldPos);
    o.screenPos = ComputeScreenPos(o.vertex);
    COMPUTE_EYEDEPTH(o.eyeZ);
    o.uv = v.uv;
    return o;
}

fixed4 frag (v2f i) : SV_Target
{
    float3 worldNormal = normalize(i.worldNormal);
    float3 worldViewDir = normalize(i.worldViewDir);
    float rim = 1 - saturate(dot(worldNormal, worldViewDir)) * _RimPower;//越边缘法线和视线点成数值越小rim越大越亮

    float screenZ = LinearEyeDepth(SAMPLE_DEPTH_TEXTURE_PROJ(_CameraDepthTexture, UNITY_PROJ_COORD(i.screenPos)));
    float intersect = (1 - (screenZ - i.eyeZ)) * _IntersectionPower;//越接近相交处intersect越大越亮
    float v = max(rim, intersect);

    return _MainColor * v;
}
全局雾效
通过深度图,我们可以获取到每个像素点的深度,在后处理中,我们可以让像素点的颜色随着距离的增大而加加深某种颜色形成全局雾效
fixed4 frag (v2f i) : SV_Target
{
    fixed4 col = tex2D(_MainTex, i.uv.xy);
    float depth = SAMPLE_DEPTH_TEXTURE(_CameraDepthTexture, i.uv);
    float linearDepth = Linear01Depth(depth);
    float fogDensity = saturate(linearDepth * _FogDensity);
    fixed4 finalColor = lerp(col, _FogColor, fogDensity);
    return finalColor;
}
垂直雾效
通过重建坐标系,我们能拿到像素的世界空间坐标,让雾的浓度随着Y的增加而变化就形成了垂直雾效
v2f vert (appdata v)
{
    v2f o;
    o.vertex = UnityObjectToClipPos(v.vertex);
    o.uv = v.uv;
    int ix = (int)o.uv.x;
    int iy = (int)o.uv.y;
    o.frustumDir = _FrustumDir[ix + 2 * iy];
    return o;
}

fixed4 frag (v2f i) : SV_Target
{
    fixed4 col = tex2D(_MainTex, i.uv);
    float depth = SAMPLE_DEPTH_TEXTURE(_CameraDepthTexture, i.uv);
    float linearEyeDepth = LinearEyeDepth(depth);
    float3 worldPos = _WorldSpaceCameraPos + linearEyeDepth * i.frustumDir.xyz;
    float fogDensity = (worldPos.y - _StartY) / (_EndY - _StartY);
    fogDensity = saturate(fogDensity * _FogDensity);

    fixed3 finalColor = lerp(_FogColor, col, fogDensity).xyz;
    return fixed4(finalColor, 1.0);
}
水淹
利用重建坐标系得到的世界空间坐标,我们还可以实现水淹效果,通过判断Y值与阈值的大小进行原图颜色与水颜色的混合
v2f vert (appdata v)
{
    v2f o;
    o.vertex = UnityObjectToClipPos(v.vertex);
    o.uv = v.uv;
    int ix = (int)o.uv.x;
    int iy = (int)o.uv.y;
    o.frustumDir = _FrustumDir[ix + 2 * iy];
    return o;
}

fixed4 frag (v2f i) : SV_Target
{
    fixed4 col = tex2D(_MainTex, i.uv.xy);
    float depth = SAMPLE_DEPTH_TEXTURE(_CameraDepthTexture, i.uv);
    float linearEyeDepth = LinearEyeDepth(depth);
    float3 worldPos = _WorldSpaceCameraPos.xyz + i.frustumDir * linearEyeDepth;

    if(worldPos.y < _WaterHeight)
    return lerp(col, _WaterColor, _WaterColor.a); //半透明

    return col;
}
边缘检测
通过像素附近四个角的深度值差异,我们可以判断像素点是否是物体的边缘,以此实现一些边缘的效果
v2f vert (appdata v)
{
    v2f o;
    o.vertex = UnityObjectToClipPos(v.vertex);
    o.uv[0] = v.uv;
    float2 uv = v.uv;
    //Robers算子
    o.uv[1] = uv + _MainTex_TexelSize.xy * float2(-1, -1);
    o.uv[2] = uv + _MainTex_TexelSize.xy * float2(-1, 1);
    o.uv[3] = uv + _MainTex_TexelSize.xy * float2(1, -1);
    o.uv[4] = uv + _MainTex_TexelSize.xy * float2(1, 1);

    return o;
}

fixed4 frag (v2f i) : SV_Target
{
    fixed4 col = tex2D(_MainTex, i.uv[0]);

    float sample1 = Linear01Depth(SAMPLE_DEPTH_TEXTURE(_CameraDepthTexture, i.uv[1]));
    float sample2 = Linear01Depth(SAMPLE_DEPTH_TEXTURE(_CameraDepthTexture, i.uv[2]));
    float sample3 = Linear01Depth(SAMPLE_DEPTH_TEXTURE(_CameraDepthTexture, i.uv[3]));
    float sample4 = Linear01Depth(SAMPLE_DEPTH_TEXTURE(_CameraDepthTexture, i.uv[4]));

    float edge = 1.0;
    //对角线的差异相乘
    edge *= abs(sample1 - sample4) < _EdgeThreshold ? 1.0 : 0.0;
    edge *= abs(sample2 - sample3) < _EdgeThreshold ? 1.0 : 0.0;

    return edge;
    //return lerp(0, col, edge); //描边
}
运动模糊
如果物体不动,摄像机动,我们通过上述第一种方式重建世界坐标系,通过此时的NDC坐标推倒出像素的世界坐标,再通过上一帧的VP矩阵得到当前的NDC坐标,两个坐标相减可以获得像素点的速度,在像素点的运行轨迹上采样取平均即可获得模糊效果
fixed4 frag (v2f i) : SV_Target
{
    fixed4 col = tex2D(_MainTex, i.uv.xy);

    float depth = SAMPLE_DEPTH_TEXTURE(_CameraDepthTexture, i.uv);
    float4 H = float4(i.uv.x * 2 - 1, i.uv.y * 2 - 1,(1 - depth) * 2 - 1, 1); //NDC坐标
    float4 D = mul(_CurrentInverseVP, H);
    float4 W = D / D.w; //将齐次坐标w分量变1得到世界坐标

    float4 currentPos = H;
    float4 lastPos = mul(_LastVP, W);
    lastPos /= lastPos.w;

    //获得速度
    float2 velocity = (currentPos - lastPos) / 2.0;
    float2 uv = i.uv;
    uv += velocity;
    int numSamples = 3;
    for(int index = 1; index < numSamples; index++, uv += velocity)
    {
    col += tex2D(_MainTex, uv);
    }
    col /= numSamples;

    return col;
}
景深
景深是在聚焦处清晰,其他地方模糊的效果,我们通过采样一块像素做平均的方式渲染一张模糊的图,然后通过焦点和像素的距离混合原图颜色和模糊颜色得到景深的效果
//C#
private void OnRenderImage(RenderTexture source, RenderTexture destination)
{
    if(blurMat != null && dofMat != null)
    {
        RenderTexture blurTex = RenderTexture.GetTemporary(source.width, source.height, 16);
        Graphics.Blit(source, blurTex, blurMat);
        dofMat.SetTexture("_BlurTex", blurTex);
        Graphics.Blit(source, destination, dofMat);
    }
    else
    {
        Graphics.Blit(source, destination);
    }
}
//模糊图
v2f vert (appdata v)
{
    v2f o;
    o.vertex = UnityObjectToClipPos(v.vertex);

    o.uv[0] = v.uv + _MainTex_TexelSize.xy * float2(-1, -1) * _BlurLevel;
    o.uv[1] = v.uv + _MainTex_TexelSize.xy * float2(-1, 0) * _BlurLevel;
    o.uv[2] = v.uv + _MainTex_TexelSize.xy * float2(-1, 1) * _BlurLevel;
    o.uv[3] = v.uv + _MainTex_TexelSize.xy * float2(0, -1) * _BlurLevel;
    o.uv[4] = v.uv + _MainTex_TexelSize.xy * float2(0, 0) * _BlurLevel;
    o.uv[5] = v.uv + _MainTex_TexelSize.xy * float2(0, 1) * _BlurLevel;
    o.uv[6] = v.uv + _MainTex_TexelSize.xy * float2(1, -1) * _BlurLevel;
    o.uv[7] = v.uv + _MainTex_TexelSize.xy * float2(1, 0) * _BlurLevel;
    o.uv[8] = v.uv + _MainTex_TexelSize.xy * float2(1, 1) * _BlurLevel;

    return o;
}

fixed4 frag (v2f i) : SV_Target
{
    fixed4 col = tex2D(_MainTex, i.uv[0]);
    col += tex2D(_MainTex, i.uv[1]);
    col += tex2D(_MainTex, i.uv[2]);
    col += tex2D(_MainTex, i.uv[3]);
    col += tex2D(_MainTex, i.uv[4]);
    col += tex2D(_MainTex, i.uv[5]);
    col += tex2D(_MainTex, i.uv[6]);
    col += tex2D(_MainTex, i.uv[7]);
    col += tex2D(_MainTex, i.uv[8]);
    col /= 9;
    return col;
}
//混合
fixed4 frag (v2f i) : SV_Target
{
    fixed4 col = tex2D(_MainTex, i.uv.xy);
    fixed4 blurCol = tex2D(_BlurTex, i.uv);
    float depth = SAMPLE_DEPTH_TEXTURE(_CameraDepthTexture, i.uv);
    float linearDepth = Linear01Depth(depth);
    float v = saturate(abs(linearDepth - _FocusDistance) * _FocusLevel);
    return lerp(col, blurCol, v);
}